Sunday, March 22, 2015

Stitch Fix #3

I got my third Stitch Fix box yesterday! If you're reading this for the first time, check out my first blog post for more info on what Stitch Fix is. If you decide to sign up, use my referral link as it will get me credit for future boxes :)

After my last box, I requested my same stylist, Kirsten. I mentioned to Kirsten that I have a ski trip, a family reunion, 2 parties, and some overnight guests coming all in April, so it's a really busy month! I've also been pinning to my Pinterest board lots of bright colors since Spring is coming around, so I made sure to mention my craving for color.

If you are thinking about starting Stitch Fix, I'd highly recommend designating a Pinterest board for your personal style. Pin items that you think would look good on you and that you'd like to see in your boxes, and in the comment area say specifically what you like about it. The stylists usually reference your board so you know they looked at it and chose items based on that. 


When I opened my box, I saw loads of color, so I was instantly happy! Plus, a cute note from Kirsten referencing my Pinterest stuff and how she picked a bright coral piece to reflect some tops that I'd pinned recently. She also mentioned another cobalt blue attempt, as I've been having trouble finding the perfect blue top lately and requested one. I've been pinning my photos to Pinterest to help other StitchFixers see their items on someone else, as I like to see my stuff on other body types, too. I also know that some people do a little item stalking when they know their shipment is coming, so of course I'll help facilitate any future item searches from other StitchFixers.


So, here's what I got! I won't tell you my final verdict, as I'd love some input from my readers this time around. Thanks!

Item #1: 41 Hawthorn- Rosa Tab Sleeve V-neck Blouse, Coral


Really amazing color, and very bright as requested. I've never really had luck with blouses in the past, so I was a little nervous to try this one. Somehow they're always too tight and too loose at the same time. (Remember the blue top from my first fix? I thought I was going to bust through the sleeves, yet it the torso hung from me like a sack.) This one has a v-neck and a pleat in the front with tab sleeves, and I can honestly say that I don't own a single blouse anymore, so I don't have anything like it. 

 First tried with my new polka dot pants, then untucked with a cream lace skirt , then tucked with black pumps.

Ultimate decision: You tell me! I need to perfect my sleeve-rolling skills, as I see now that they looked a little sloppy. Nonetheless, I could see myself wearing this with loads of pieces in my closet.

Item #2: Loveappella- Delaney Cowl Neck Knit Top, Cobalt


Here is the much desired cobalt blue that I've been searching for so much. This is a soft almost wide-sleeveless top with a very loose cowl neck. I found myself rolling the sleeves up a bit to make it more comfortable, and I wished the cowl neck was less dramatic. I'm sure when I bend over you could see all the way through to my belly button. However, it's soft, stretchy and a good length.

 First with some bright teal pants, then white jeans and gold flats. The 2nd picture shows the true depth of the cowl neck and width of the sleeves.

So in my search for a top of this color outside of Stitch Fix, I found a reversible cobalt blue/bright green top at Express that is about $10 cheaper than this one. It has spaghetti straps and a cool high back with a keyhole cut out. I like that it's reversible, and the fit and quality is nice, but I'd have to wear it with a cardi to work, of course, so I'm not sure how I feel about that. It's a little less conservative that I'd like to be, also.

 Cobalt blue reversible top from Express. Ignore the bun.

Ultimate decision: Undecided, but loving the blue! Here is where I solicit your opinion: which one is a keeper, or should I return them both? I want to make sure what I keep is flattering and versatile, so if I should take them both back and continue my hunt, I will do that.

Item #3: Papermoon- Lexis Knit Top, Black


So, this item is definitely not black. :) I really appreciate all the color, but the pattern strikes me as very country. Of course, it has the same name as my cat, so I gave it a try!

Blah.

Ultimate decision: Spoiler alert: this is going back. I feel terrible in this top. Oh well!

 Item #4: Pixley- Marie Abstract Chevron Elastic Waist Dress, Light Pink


This is a cute, soft, flowy dress with a subtle pattern. I wasn't crazy about it right away, and I was concerned that the elastic waist would billow out and make me look chunky. However, it was pretty cute! It's different from anything I have, as light pink isn't really a color I gravitate towards often. I tend to wear jean jackets with dresses often in summer instead of cardis, so I tried it out with that.

 Alone with nude wedges, or with denim jacket and black wedges. 

Ultimate decision: You tell me. Cute, or no?

Item #5: Pixley- Florence Colorblocked Dress, Navy


Another tank dress with an elastic waist, but I like navy and the green was pretty. I know colorblocking is really in, so there's that, and this dress is casual and dressy at the same time. The thick straps make it work appropriate without a cardi, so I could wear it a million times and places. It's also somewhat neutral so I could spice it up with bright jewelry (as I did below. Too much?), cardis, shoes, whatever. However, I'm still unsure about the elastic waist and blousy-ness of these dresses. I appreciate that I could eat a big lunch and not be self-conscious, but is it a flattering look for my body type? Help a girl out!

 Just the dress, then with stone necklace and gold flats, then with yellow statement necklace for a bolder color palette. 

Ultimate decision: Help! Does this style work for me? 

So, besides realizing that I am in need of a haircut and a darker hair-tie, I have a vague idea about what I want to keep and what didn't work for me. I love Kirsten as my stylist and feel like she really gets me and listens to my wants, so I will definitely be requesting her again! (Thanks, Kirsten!!) She typically throws in a wild card that seems different from the rest of the bunch, and while the last 2 haven't worked for me (black and white skirt from #2, and patterned top from #3), it's neat to try something totally distinct from what I would normally go for. As always, this was a fun experience and I'll be doing it again! I had a $50 credit from referrals, so a shout out to Amy and my Momma for assisting in funding my purchases this month :) Thanks!


Thursday, March 12, 2015

Wall prep

So I know this is a really captivating topic to talk about, but I feel my particular type of wall prep is worth mentioning, just in case anyone ever runs across the problem that I had.  

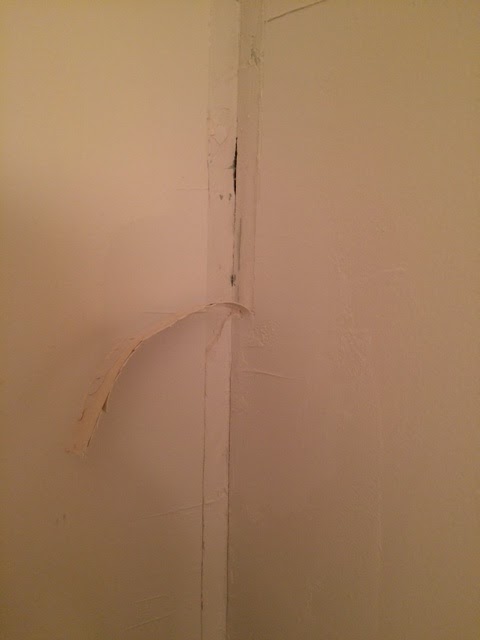
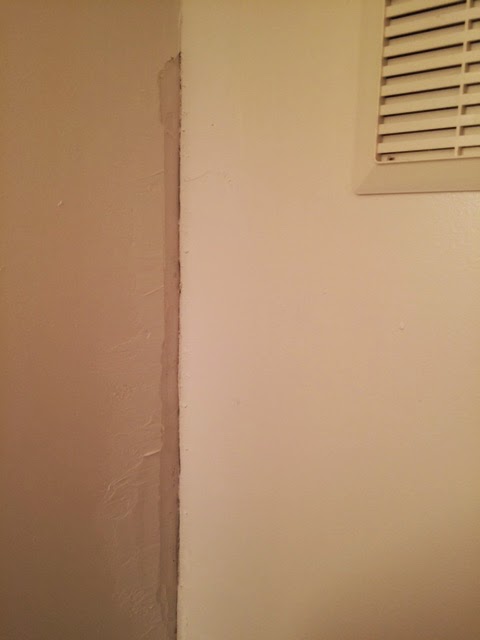
Last week when I started this mini bathroom reno on one of my many snow days at home, I began by spackling some annoying wall bubbles and seam issues, as well as the holes from the wall cabinet above the sink. Well, when I went down to admire my work over the weekend and see if it was ready to sand, I noticed some of the same ugly bubbles and cracks had reappeared! Grumble.

Hard to see in photos, but crack just above corner edge and bubbles along vertical corner.

Well, that just won't do. Fortunately, my really awesome father-in-law was in town Friday night, so I could ask him why in the world this was happening again, especially considering I'd already put 2 layers of compound on the walls! He took one look and told me what was up: the basement builders (who I lose a little bit more respect for each and every day. Remember those nail pops all over my house?? Ugh.) used drywall tape incorrectly AND, as I had found out earlier, did not wash the walls after they had sanded. These 2 problems are unrelated, but can cause complications:
  • drywall is super tricky, so I can't really throw much blame for this one, but...
  • not wiping down the walls after sanding leaves a film of dust can prevent paint from really sticking to the wall. It can flake off, bubble, chip, etc.

So... on to the fix. I promised myself I'd only work for 10 minutes, but we know how that goes. I took a box cutter and sadly cut out all of my hard work from the other day. I sliced out about 1.5 inches on each side of the corner from the ceiling to the floor, so as to make sure to remove all of the tape, instead of just covering it as I had done previously. Man I wish I had known! The removal is easy in theory, but also required some chopping, flicking, and peeling. I was left with a lovely mess.

Peeling tape, and the hole it leaves behind.

I then took my mud and filled in everything smooth. I actually find mudding soothing and therapeutic. I must be crazy! Something about making smooth, clean lines and angles. Ahhh. It seemed the tape was just complicating things, so I omitted it. 

Just a tip: For future reference, and if you have an option when doing it yourself, I prefer to use the mesh stuff because it tends to stick better, and of course since it's mesh, no air bubbles. 

An hour later (so much for 10 minutes...), I was left with some wet walls and a big mess.


Total floor disaster, but it's ok because I'll be ripping that tile out oh-so-soon!

Now I wait to see if I need to do any touch-ups tomorrow, and then maybe I can get ready to paint! Still coming soon... tile! Hooray!

Thursday, March 5, 2015

Finding new things to fix.

As I mentioned in my last post, I am a serial fixer. And with all the snow days lately, I've had plenty of time to plan my next projects. We had three snow days this week, and I had about had it with myself, as I'd been spending my days pinning ideas on Pinterest, but not actually doing anything. I realized I wasn't going anywhere anytime soon and things weren't going to happen on their own, so I went downstairs and, without putting too much thought into it, just started patching the peeling walls in our basement bathroom. Why the walls were peeling, I will never know... but I did know they needed to be fixed.

Well, wall patching led to unscrewing cabinets, and unscrewing cabinets led to undoing plumbing, and before we knew it, thanks to me, we started our "practice" bathroom.

Now we call this our "practice" because we want to have a bit of a warm-up before really diving into our master bathroom reno. Basically, we want to get all our mistakes out of our systems somewhere where we won't have to look at them every day! Of course, let's hope there are none, though...

But first, let me tell you. This basement bathroom is so awkward! We've been talking about fixing it since before we bought the house, so it's about time we made a move. It has those peely cream walls, a cringe-worthy beige tile floor, a nearly non-functional toilet, a monstrous vanity, and a weird, deep, mirrored cabinet. It's extremely tiny for a full bath, which is ok because it won't get much traffic, but the space right now is barely useable. Here are some before pics:

Our before pictures are terrible. I will admit that we realized after taking out the cabinet and sink that we forgot to take "before" pics, so we put everything back in. Those before pics are so important! We knew we'd regret not having them, so it was worth backtracking a few minutes.

Although this is a pretty tragic start, it can be dramatically improved. My max budget is $400.

Our plan is:
  • Wall paint: ~$30 at Benjamin Moore. The walls are in rough shape, so we need a high quality paint that will be a bit more concealing than the typical stuff. For such a small room, we won't need much, so it should be worth it.
  • Tile floor: ~$60 at Home Depot. We already have lots of materials (mortar and grout) from doing our kitchen backsplash, so we can probably get away with keeping it around that price.
  • Pedestal sink: ~$60 at Lowes for a small one. This will make the place seem so much bigger. I can't wait to put that in!
  • Toilet: ~$100 at Home Depot. Hubbs already has his favorite reliable flusher picked out!
  • Faucet: ~$30 or we could save by reusing the one we have. We'll see how it turns out. 
  • Mirror: ~$30 at Lowes. Or, if i'm feeling particularly crafty, I can frame a beat up one that we have left over from our half-bath reno. We will see how we're doing on budget.
  • Lighting: ~$30. Rough estimate, as this is the one thing I haven't made a decision on yet. Again, the starting look is so terrible, anything will be an improvement. Better get looking!  
  • TP holder: ~$20. Recessed, to maximize space. 
  • Towel bar: ~$20. These suckers are surprisingly expensive! Or maybe I can find some small shelves that will work better. Decor is the last step, so I can hold off for a bit.
If we come in under budget and the finished product still isn't quite there, I have my eye on a snazzy way to spruce things up:
    • paint the almond bath-fitter shower a crisp white using Rustoleum tub and tile paint. See page here for inspiration. $26 on amazon. 
Otherwise, we will take what we end up with.

I'll leave you with my "during" photos of how I got spackle-crazy:


Things are already looking better without the huge mirror and cabinet, but man do I hate that floor! I can't wait to get it out. Next up, demo and tile! 

A year in the making.

Well, I began this blog thinking I would use it to narrate my Stitch Fix escapades, which I will continue to do because it's just too fun. However, I find that I am constantly finding something that needs fixing in my life, and as it turns out, my wardrobe isn't all that needs work. Let's just call me an addicted fixer. Even if something's not broken, I will try to find a way to make it better.

Before I dive into the newest so-called problem to fix, I'll give you a recap of the last year.

Most of you know that hubbs and I bought a house a year ago (March 2014). 

 Here is May 2014 vs July 2014. We love our cute little row home!

We moved in and immediately (literally, the next day) began renovating our first floor living room, kitchen, and bathroom. It was a huge renovation that included moving walls, replacing the ceiling, installing wood floors, building cabinets, tiling, painting, plumbing, and electrical work. See the hideous before pics, and surely you can understand why we couldn't wait just one more minute to start:


   Blah to the light wood cabinets, black appliances, and beige tiles. I really hate beige. 

We knocked out the bulk head and a half wall, put in some recessed lights, expanded the doorway, and took some really scary reno photos:


A total mess.

But the afters really make everything worth it:


Ahhhhhhh.

It was a total overhaul of the first floor that we did 97% by ourselves with loads of help from Adam's family (a friend also gave us some drywall and paint while we were at work. Thanks David!).

At the time, we had NO idea what we were doing so I couldn't possibly have written about it, but we learned so much that we could probably do it again with less difficulty in our next home. 

Since we finished our first floor over the summer, and I gave our basement a little face lift over the winter, I've now been itching to start a new big reno. I do recognize that this is only a townhouse and there is a certain max point where we won't get the money back, but it's so much fun! I figure if we live in it and enjoy our hard work for a while, it's well worth it.

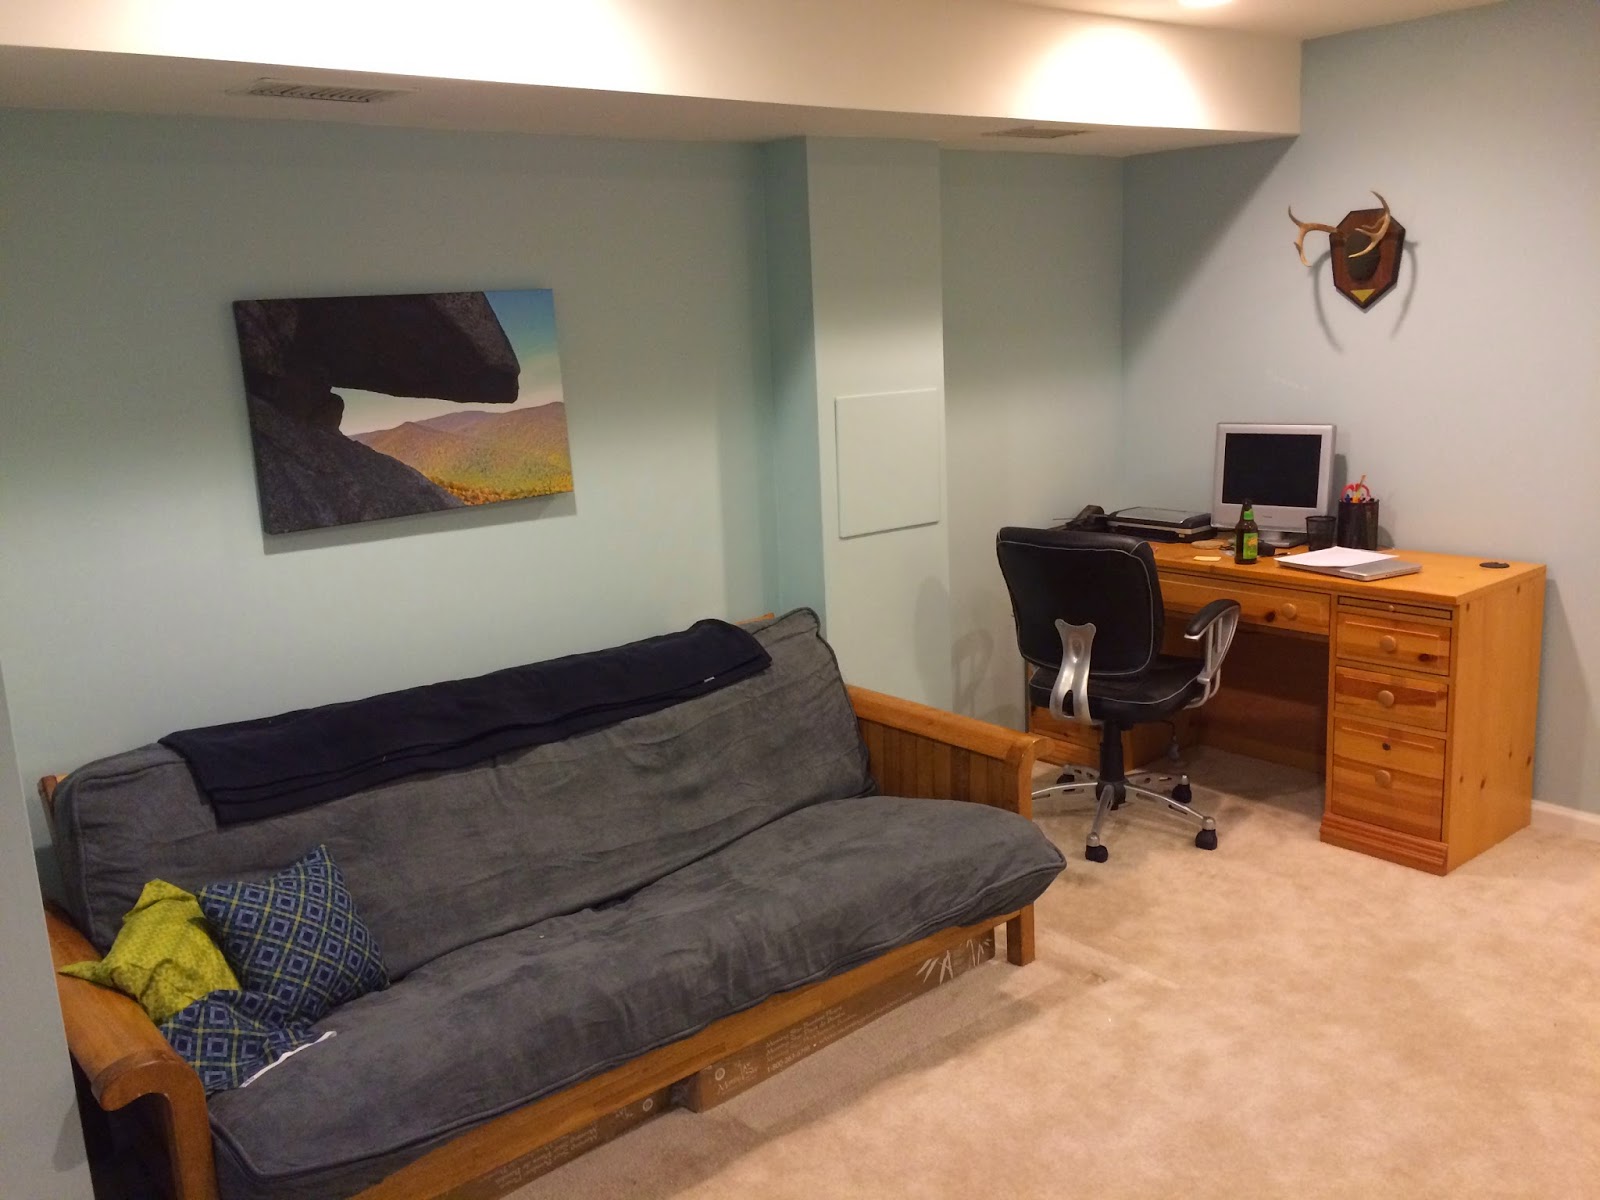
 So soothing and slightly rustic "man cave" basement.

With that said, my lofty running reno list for our teal-infused townhome includes: kitchen, living room, half bath, basement, basement bathroom, master bathroom, built-in master closets, a 3rd bedroom conversion for our loft, jack-and-jill bathroom, and a few other mini things here and there. Now that I've gotten the hang of some DIY things, I figure I'll share my experiences with all of you to prove (or disprove... we'll see) that doing it yourself is not as hard as it seems. If you'd like, follow me for house stuff, or if not stick around for my monthly Stitch Fix updates. I'll be here!

Coming soon... basement bathroom.