Thursday, March 17, 2016

Herringbone wall


Yay! I'm so excited about this post! I saw some cool home blogs on Pinterest over my very long blizzard break that detailed the steps of taping off a patterned wall. Since I had loads of time, I immediately thought "Yup, I can do this," and I started my planning process. There are a number of cool patterns you can do, but the herringbone one fits our house the best.

Besides your 2 paint colors and rollers, you need:
  • a good measuring tape
  • a level
  • a pencil
  • painter's tape with edge lock. I went with the narrower tape (~1" thick) because I thought it would look better
As for paint color choices, I've seen this done with a flat and a high gloss of the same color, and it looks awesome too!
The project space began as a nasty beige wall in our ho-hum loft. I can't tell you how much I hate beige! This space was really just a carpeted storage unit, as we had no plan for it and didn't really like its layout. A great accent wall would definitely help!

The best "before" that I have. It's the wall to the right, behind all the junk!

I started by clearing away all that junk, and then I painted the wall a crisp white. One coat of paint is enough, because you are ultimately painting over it.

A beautiful white wall. NO MORE BEIGE!

Since I'm a teacher and all my teacher friends had cabin fever after a week off, I invited over a close friend who needed to get out! She helped me through the stress of measuring, calculating, and deciding how I wanted to do all of this.

I thought it looks best if you work with a 3:4-ish ratio, about 12" h x 16" w. We first measured the wall from side to side, and then we divided it by 16". It wasn't exact, but with some wiggle room (I think it ended up at 15.75"), we wound up with 5 columns of the full V pattern, or 10 half-Vs. We marked the measurements at the top and bottom of the wall. We then added vertical tape lines at every mark and checked straightness with the level.


Next, we measured the vertical length and aimed for dividing it by a foot. It worked out to about 13" to get an even number, making 6 Vs top to bottom. I measured and marked on the tape where each V should start and finish. I then took the level and went all the way across the wall, ensuring that all Vs would start and end at the same height across the whole room.


Finally, as you can see above, we started connecting our vertical marks with tape. Instead of on the horizontal level, we went diagonally from top to bottom, using our vertical lines as a midpoint. Things got a little interesting towards the side, since the wall didn't meet the ceiling at 90 degrees, but I just eyeballed the inner angles at the base of the Vs and made them even.

Once we were done, we ran over everything with a credit card to make sure everything was seriously stuck down.

Don't mind all the junk, we ran out of storage space.

Then came the brave part: the paint. This was scary because I knew there was no turning back! I hesitated for a few days... even though the worst thing that could've happened was that I ripped all the tape off and painted it solid. But that would've been so much work wasted! I finally worked up the guts and gave the whole thing 2 coats of our gray paint.


I let it dry for only about 30 minutes and then started to rip it off. It's easier if the paint is still a bit tacky when you start to pull so it won't rip off any of the dried paint. After that dreaded first tape pull, everything was pretty easy and awesome. Just be careful when pulling off: if your paint is still a bit wet on the tape, you don't want to make a mess.


Pull everything off slowly and admire your work!


Now that it's all done, I looove this room! The bookshelf from my last post is on the opposite wall too, so it's a really cool spot. I am still struggling with decorating, so I will happily take any design and decor tips that you'd like to offer. This will be my sewing/craft room for now, so a desk must be against this wall. Leave me a comment with your decor suggestions!

Thursday, March 10, 2016

Shelf wall


The new room that we're working on is a huge improvement from the original, but this is definitely one of the more interesting features in it. We noticed that both of our bookshelves throughout the house were overflowing, and I saw this pretty cool post from Not So Ordinary Life that was great inspiration: a cute how-to for a half-wall bookshelf. Now the plans on this blog didn't quite work for our space, so we modified it nicely to fit our needs.

Materials needed:
  • 2x10s for your base, top, sides, and vertical posts
  • drywall for back, sanding and spackle tools for seams/nail holes
  • 1x10 for your top cap
  • 2x4s for your base shelf supports 
  • 2" double beveled trim
  • 3" single beveled trim
  • 4" baseboard
  • laminate shelves at 1x10"- we used three in each section
  • shelf pins
  • primer
  • white high gloss paint
  • white baseboard/trim caulk 
  • long screws + screwdriver
  • nail gun + nails

We already had one half-wall built and knew the bookshelf wall would be perpendicular to it. We measured from the existing half-wall to the stairway to get our length, and then cut top and bottom pieces at that length using 2x10s.

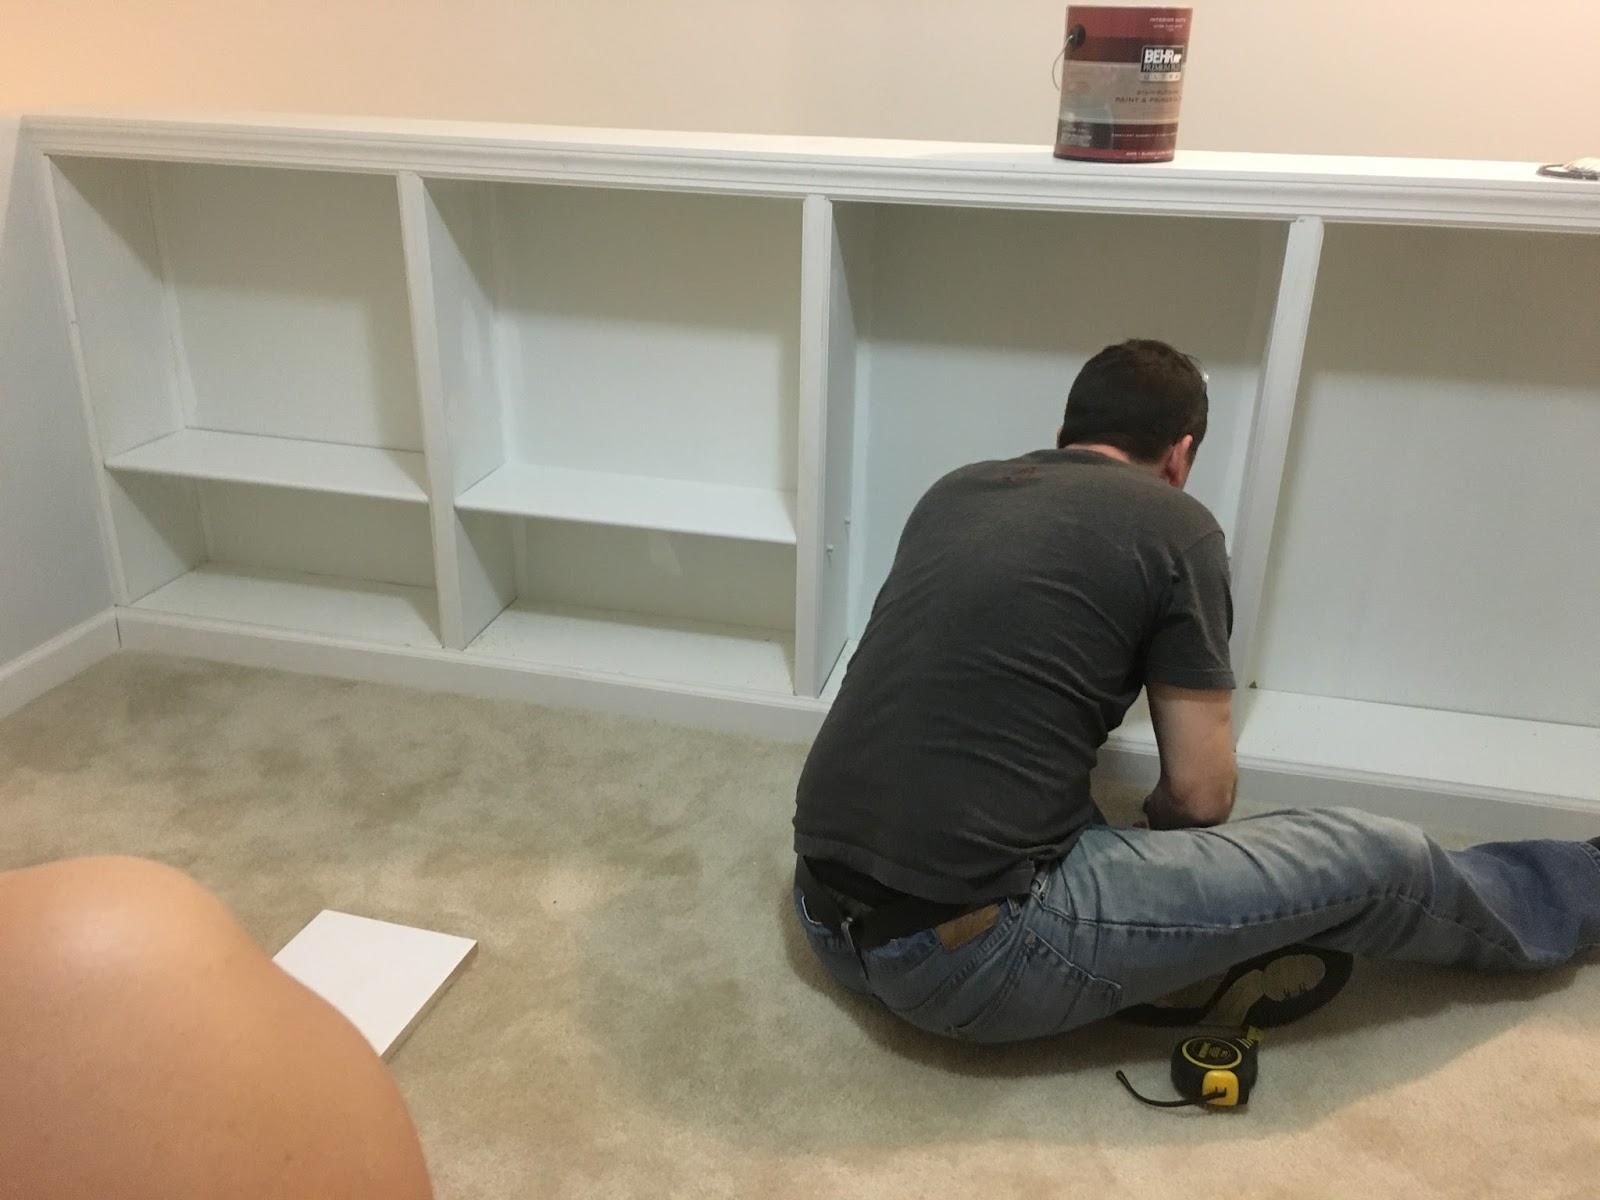
For the verticals and sides, we measured the height of our existing half wall (34" if I remember correctly). We then divided our total length by 4 sections, since we didn't want the shelves to sag with the weight of the books. Each vertical post and side (5 posts total) was cut at 30" to allow for the 2" top and 2" bottom. We screwed all this together at equal increments to make a frame, then screwed that frame to the floor and to the pre-existing half wall for stability. Here's an action shot of hubby at work:


Once everything was all screwed together and super sturdy, we drywalled the back of the shelf, as well as the rest of the room. Everything was spackled and sanded, and then the walls and the outward-facing drywall of the bookshelf were all painted light gray.


I then primed the whole dang thing, top + sides + back + underneath to make it nice and paintable. We knew we'd be adding laminate shelves later, so I didn't worry about the base yet.


The next step was trim. We wanted a solid cap piece for our half wall and bookshelf to defend the wall from any damage by leaners. To make it, we sliced a 1x10 board to size for both walls, matching them in the middle. Then, we nailed in a 3" wide trim piece to the top face, being careful to line it up on top with the new top cap for a smooth feel. Since the vertical posts were 2x10s, we found a lovely 2'' double beveled trim, cut it to size, and placed it along the front of the vertical posts, cutting it at an angle so that it slipped up over the top trim. This hid any visible 2x10 and made a smooth transition between all trim pieces.

We also added a 4" baseboard to our half wall and pushed the carpet back underneath in preparation for the bookshelf baseboard. This involved tack strips and stretching to get the carpet back where it was.


The wood pieces you see stacked on top here would soon become the supports for each base shelf. I screwed those in to the base at all 4 corners. You could technically just cut one for the whole length of the front and back of each section, but we only had a single 2x4 left over so we were being conservative. After, we nailed the bottom baseboard to these base pieces, allowing for a 1" overhang on top to hold the laminate shelves.


We were then ready for the shelves. Adam sliced our shelves at the proper width and hung them on shelf pins, making sure to level everything up. The base shelves tucked nicely down inside the cubbies we made for them.

Sorry, my knee got in the way here.

Meanwhile, I painted the whole inside of the shelf, all trims, and baseboards a crisp, glossy white. After allowing the shelf to dry, we hung everything up and admired. Almost there!


The final step was to caulk the crap out of it to hide any imperfections. I did this in a breezy 3 hours (guh) with the help of my cat Zoe, who was all too happy to be allowed back into her sunny spot for the first time in months.


Ta-da! Happy cat and cute bookshelf. All we are missing is books, but those will be there soon enough.


We have one more cool little feature to show you about this room before we move on to our bathroom reno. After that, you will have to wait a bit to see the whole reveal, since we won't be officially moving in until everything is complete. Here's hoping we're done and moved in by the end of summer!

Monday, February 29, 2016

Let's do it.


I'm a terrible blogger. I can't tell you how many times I sat down to write an update and just never did it! But here we are, more than a month from my last post, and I'm just getting around to posting. We're not quite done with stuff yet, so I don't feel that far behind in the big scheme of things, but we're getting closer!

Anyhow, here's our midway post showing what we did after we destroyed the whole upstairs, because I promise we did fix things and want to prove it!

I left you a month ago with some torn up carpet and 2x4-framed walls. Well, after we had wall frames, we needed drywall. My beautiful, loving husband spent about 10 hours one day screwing heavy drywall sheets to the frames, alone, high up on a ladder. I am very thankful for him and that he's alive to tell the story!

Looks good, huh?
I came in behind him and mudded all the joints, screw holes, and imperfections. I say this as if it were only an hour or two, but in reality it was probably about 6-7 days. GAH. Mud, dry for 24 hours, sand, try again. Obviously I'm not a pro at this and, before this project, had no idea what I was doing. But things turned out ok, and, by now, I'd say I'm an intermediate.


When I thought I had everything perfect, or as close as possible (let's be real: we are DIYers, so nothing is perfect), I primed all the new stuff with two coats. The goal here was to hide all imperfections so that we won't be laying in bed for the rest of our lives in this house wondering WTF we were thinking. I'm really hoping I accomplished that goal, but we will find out soon enough!


On the inside of the biggest wall is a new closet that we built to hold all our stuff. This closet is heavenly, as before we had a weird carpeted landing that didn't do a single thing. Now, we have a secret junk hole with a door. So much more useful!


Finally, the paint. Lucky for me, I had 7 (SEVEN!!!) snow days for this little dusting of snow here in Northern VA. You may have heard about it.


During these 7 days off, I managed to paint the ceiling, because for some reason is was a hideous beige before. I also painted all of the 50 enormous walls that this room somehow contains.


 We employed some less-than-safe methods to paint these awkward, tall walls in this 2-level room:


I also painted a few other things, but I'm going to save those for another post :) heh heh. We're getting so close, and I can't wait to show you the finished product!

Monday, January 18, 2016

Major Master

I alluded to this day in my last post, a recent almost 4 months ago. After we finished the bathroom, the school year started, and I was swept away in teacher things. The plan all along was to move over into the 2nd bedroom to make way for (ta-da...) a BIG reno project. Well, little did we know how enormous this project would actually be!

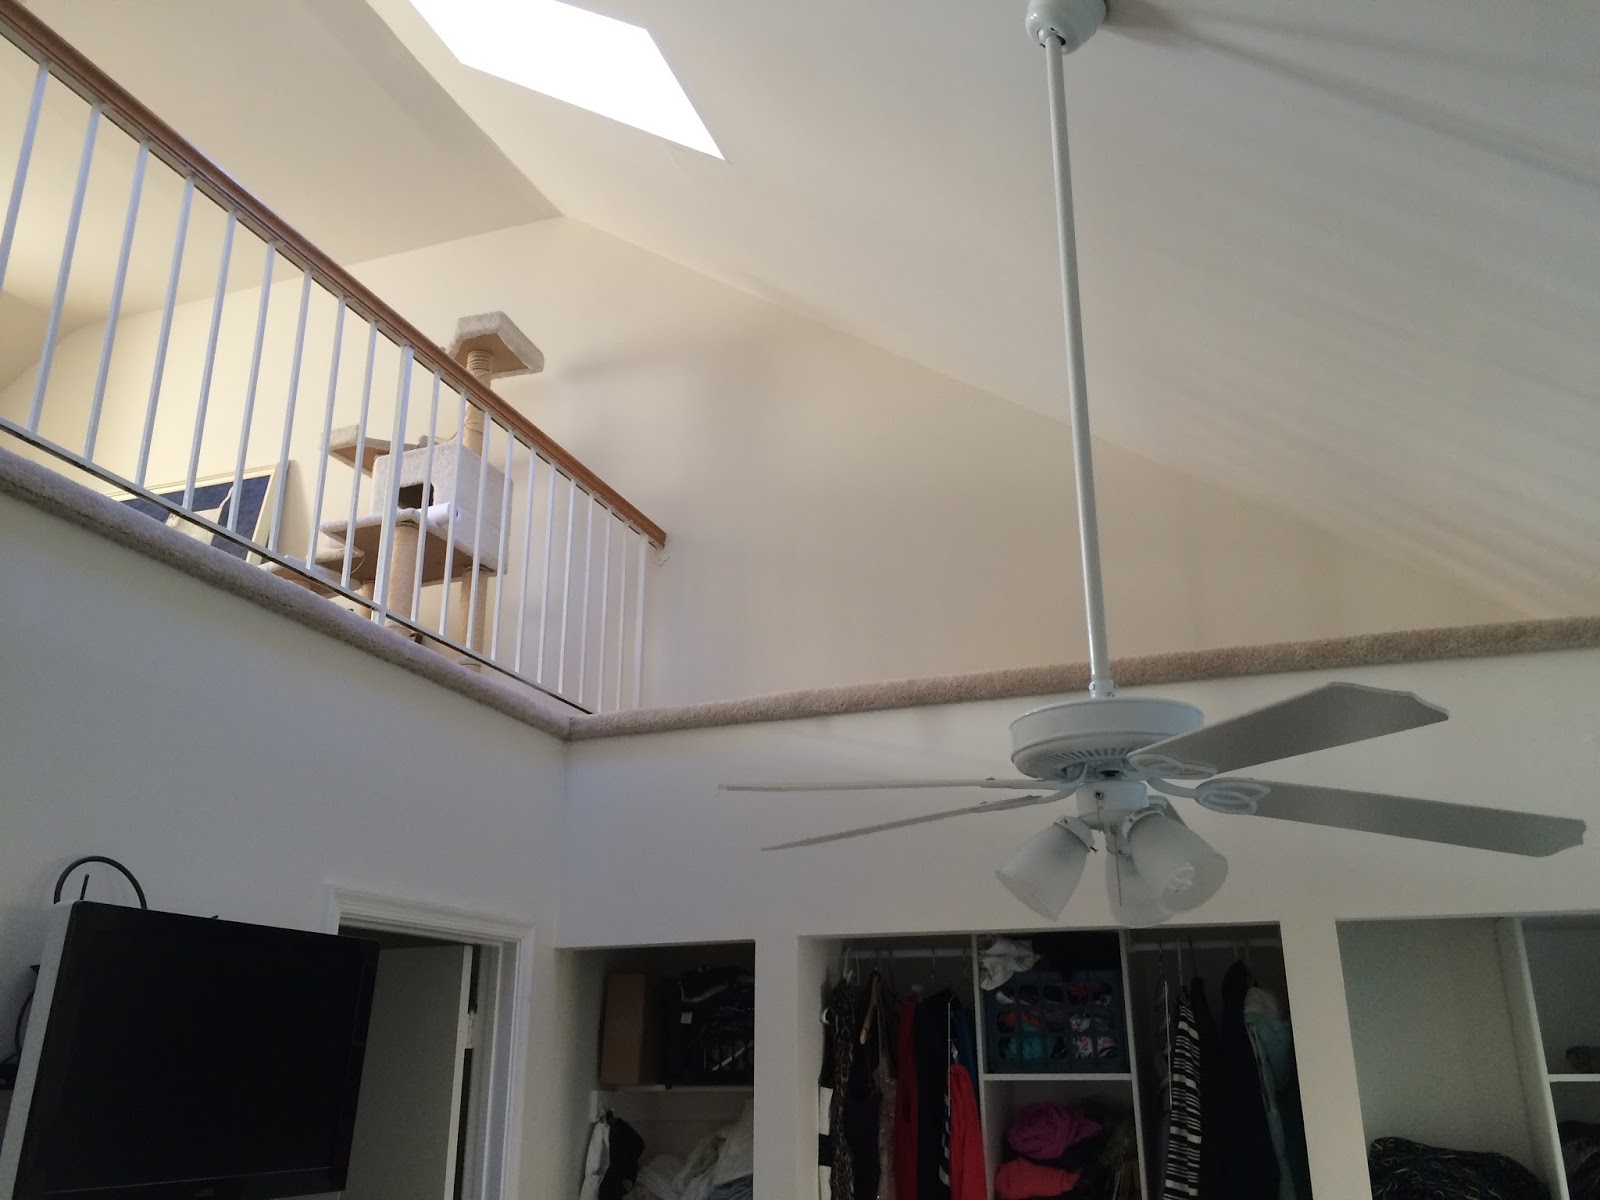
Our master bedroom is loft-style, which gives the illusion of more space with a vaulted ceiling and tall walls. We loved the openness, but hated the wrought-iron railing that spanned the width of the room and the lovely beige carpet overhang that wrapped over the wall.


The cherry on top was the carpeted landing above our closets, which was a complete waste of space. Our cats loved it, though, and had been known to chill there and stare at us while we slept! (Check out our 2 updated closets, by the way. Those are new!! We will do the linen closet one after the bathroom, when we figure out what we need for storage.)


After much discussion, we decided to build an additional closet on top of our closets to store more of our accumulating junk. Then, to give the loft a bit more of a private feel, we agreed to do a half wall all the way around. This would be a big endeavor, but would give us the extension and height we were looking for in our walls, the extra storage space we needed, and a more modern look, we hoped!

Step one was to trim and pull back the carpet to get it off the wall. Already much better looking:

Then, we chucked the iron railing, bit by bit. Ugh.


                                               A bit sketchy, but quite cool!

We then pulled the carpet back completely to preserve it and give us more working room:


 Now we were ready for building! Adam built this sweet frame for our closet:


Lexi watched from a few safe spots, despite loud drilling, sawing, and cursing:


Once screwed in to numerous studs, it was pretty sturdy and ready for a door frame:


This then gave us the stability to build the rest of our wall, at half height so as to not close everything off completely, but still give privacy to the loft space:


And from here, I will save the rest for another day! The demo and preliminary construction took about 2 weeks, and we've got some other updates to show you. Check back soon for more!

Sunday, September 27, 2015

Granite


This post will not be a how-to, but just a show-off. We've finally arrived at the final stage of our bathroom reno! The decorating, which will probably take a few years to complete, will be pushed off for a while. This bathroom will ultimately be for our future children, so we have no idea of how we want to decorate it yet. We will also be using this in the meantime while we redo our master suite, and Adam refused to live in a bathroom with ducks!

I don't expect anyone to wait until we have kids and decorate it accordingly for the reveal photos, so here's what our new bathroom looks like without decoration:

Here is our beautiful new granite, which we got at a decent price since we pulled it from the scrap pile. It looks like marble but is definitely granite, which makes us much more comfortable with durability in a kids' bathroom.

Bare turquoise walls, white cabinets, framed mirror, and our grey tile floor. The decorative items on the counter are just for show and are not permanent.

The final look, complete with ducky trashcan. The wall will stay bare for a while, but it is still looking really nice!

So, here's a rundown of budget, since I love to see how we did:

                            Expected                                  Actual
  • Wall paint: ~$50 Benjamin Moore.       $36 Home Depot- Behr Aqua Breeze
  • Tile floor: ~$60 + grout & mortar ~$25     Actually $60 + $19 for mortar. Already had grout!
  • Baseboards: ~$20                                  $20 at HD
  • Vanity: ~$300 at Home Depot.              Actually $306 at Home Depot
  • Countertop: ~$500.                                $579, but got a nicer piece than expected.
  • Lighting: ~$100.                                    $119 HD
  • Toilet: ~$200.                                        $150. Surprise! I talked Adam down to the cheaper one.
  • Faucet: ~$30                                         $30 HD
  • Mirror: reusing and framing                 Already had one piece of trim, bought the second for $7
  • TP holder: ~$30                                    $18. Hooray!
  • Towel bar/shelf?: ~$30                         Holding off on this, but will probably reuse stuff I already have.
  • Shower rod: ~$20                                 $7 HD
  • Other decorative items- $30                 TBD
             Estimate $1,395                                    Actual: $1,351 and hoping to keep it around here.

My estimate was fairly accurate this time. I'm getting better at this!

Our next renos, as previously mentioned, will be our master bathroom, master bedroom, and loft. They're gonna be pretty big ones, so they'll surely take a while. I will be discussing those in a post soon!